Resurrecting My Bread Machine
2018-07-05 do-it-yourself
In 2012, my wife and I got a bread machine (Hitachi HB-B101) from her parents. We saw the box lying around their house, unopened, and asked them for it. It had been a gift in the early 90s, with a book of coupons that all expired in 1996. We took it home and it worked perfectly. We’ve been making 2 or 3 loaves of bread per week with it ever since. It was one of the few things we took when we quit LA, road-tripped across the country, and then settled in Dallas.
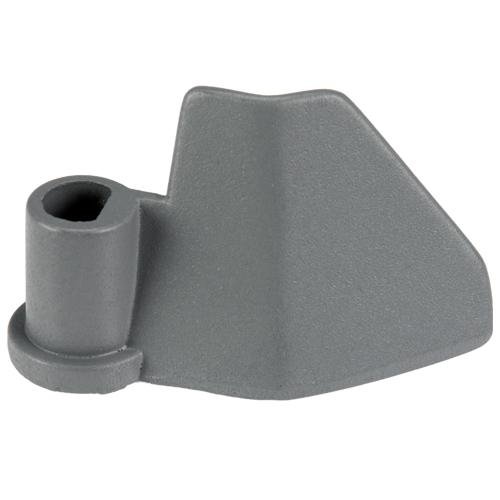
A couple of months ago, I noticed that the mixing paddle was loose/wobbling on its shaft. The way this thing works is that the bread machine’s motor turns the shaft when it needs to mix the dough, and the paddle should turn in sync with the shaft, so that the dough actually gets mixed. The shaft is circular except for a little notch, which is the thing that the paddle grabs onto to go along for the ride. The bit of my paddle that was supposed to grab the non-circular part of the shaft was starting to wear down. With wear like this, it will deteriorate very quickly until the paddle’s hole is circular and there is no more coupling of the shaft to the paddle.
The first thing I thought of was to buy a replacement paddle. There are actually a couple of HB-B101 paddles available on ebay, but they’re all used and expensive. So I can buy somebody’s crusty old paddle, probably in the same condition as mine, for $20. Or I could buy a new bread machine for like $50. Hitachi seems to have disavowed this bread machine, making no mention of it on their website whatsoever, so no warranty parts.
Next I thought about how I could fix this myself, but didn’t come up with any acceptable solutions. I tried snugging up the parts by inserting a little shim of aluminum (I tried both aluminum foil and flashing/sheet metal). This does work, but then it’s very difficult to get the paddle off (necessary for washing). And it’s fiddly to put it together in the first place. And you have to mess with this every time you set up a loaf of bread and every time you extract it. Also, with aluminum foil, it’s easy for bits of the foil to tear off and end up baked into the bread. No thanks.
I set to finding a replacement bread machine. There are a bunch of good-looking, well-reviewed options on Amazon for as little as $50. One interesting thing is how little the state of the art seems to have changed. It’s still the same aluminum bucket and paddle, sitting on a steel shaft with the same notch. The user interfaces are still very much in the mode of clunky-1980s-Japanese-appliance, though some now have LED screens. The one innovation that I noticed was that some of them will beep at you when the mixing is done, so you can reach in and fish out the paddle at that point, leaving the bread with a smaller hole in the bottom. Sounds great, except we always run our bread machine overnight.
If you go spelunking in the one-star reviews, as I always do, you find that you can’t expect any of these bread machines to last more than two years. Principal among the complaints is that the mixing paddle’s nub gets worn out, at which point it fails to engage with the shaft. Hmm, sounds familiar. Some bread machines even ship with two paddles, which must be cheaper than solving the design problem.
What if I were to splurge on a $300 Zojirushi bread machine? No dice, the one star reviews indicate the same exact issue with the paddle. But the more expensive bread machine did have higher quality reviews, including this gem where somebody suggests drilling a hole in the paddle and using a screw to snug up the parts.
So I did that.

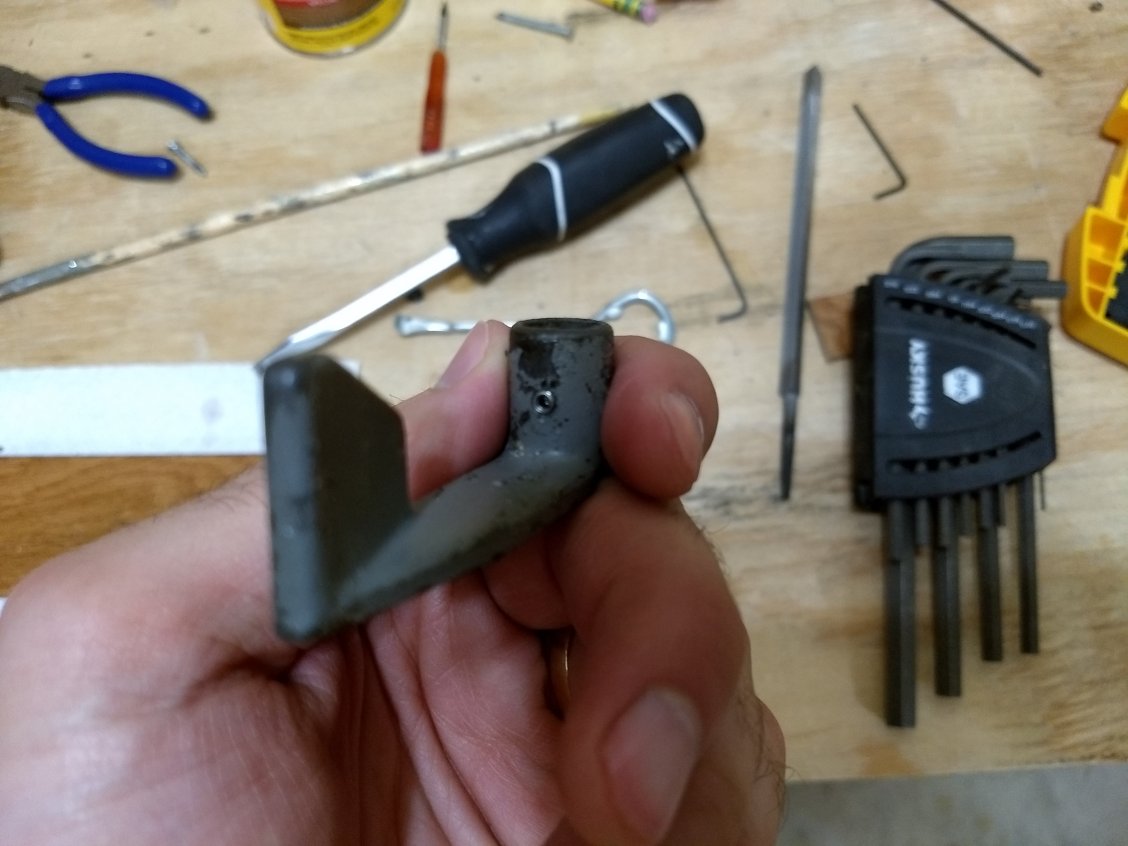
I set up the paddle on the drill press with clamps, as seen in the figure. I wanted the screw to bear on the flat surface of the shaft, though that may not be necessary. The hole had to be a little bit oblique because the extended part of the paddle blocks drilling perpendicular in that direction. Before doing this, I had picked up a couple of #6-32 set screws (a 1/16" hex key/allen wrench fits them) from Home Depot so I chose the bit to be slightly smaller than them. Once sufficiently clamped, the drilling was easy because the metal is soft (which is also why these paddles fail).
I used a set screw rather than a regular screw (another suggestion in the Amazon review comment thread) because it’s far easier, when the paddle is at the bottom of the bucket, to operate a hex key than an offset screwdriver. The screws I bought at first were 3/16" long but these are too short. It’s helpful to have the set screw extending a bit from the paddle so you can easily find the head with the hex key. I use a 3/8" long screw now.
Once I had the hole, I needed to cut threads in it. Rather than figure out how to really do that (I don’t have a tap), I opted to just take a long #6-32 electrical box screw and screw it into the hole. I tried filing grooves into the sides of the screw, to make it a tap (like this picture), but I don’t know if I did that well enough to make any difference. This was arduous, but eventually it worked.
This works well, and we’ve been using the bread machine with the set screw for about two months now. Here are the drawbacks:
- There is always some tedious labor: you need to loosen the screw to take the paddle off to wash it, and you need to tighten the screw before making a new loaf of bread.
- The screw threads inevitably get gummed up a bit with cooked bread, which can make it hard to turn. It’s hard to clean out the threads because they are so fine. I can never get it perfectly clean.
- I’ve stripped the head of a set screw, so the hex key just rotated freely in the socket. I think this was because I had been tightening the screw too much. I unscrewed the screw with pliers and replaced it. I bought a set of 50 set screws (3/8" long, #6-32) for $7 and a set of 20 1/16" hex keys for $3, just as insurance.
Moderately annoying upkeep, but definitely worth it to have our bread machine continue working. With any luck, the bread machine will last us another 6 years.